 |
|
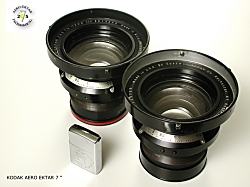
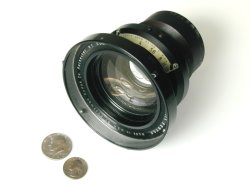
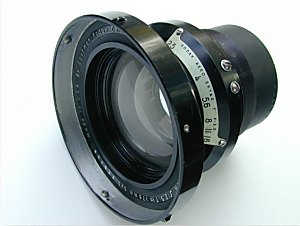
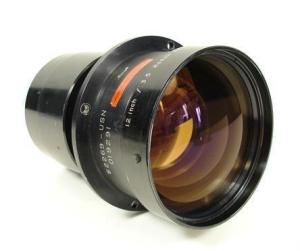
Fast lens Aero Ektar f 2.5 A short history.. Designed by Dr. Paul Rudolph in 1896 based on the double Gauss design (in 1817, C F Gauss described a telescope objective consisting of a pair of meniscus shaped elements, one positive, and one negative.) The design was 4 groups of 6 elements, and a flat field design. Symmetrical optical configuration producing low spherical aberration and astigmatism. The normal wide airspace separating the positive and negative elements in the double gauss design made a large amount of spherical aberration. Rudolph thickened the negative elements and reduced the airspace as much as possible, which corrected the spherical aberration and the sagittal/ tangential astigmatic aberration. Rudolph also inserted a "buried surface" into the thick negative elements of a cemented interface separating two type of glass having the same refractive index, but different dispersive powers. Not widely used until coating processes were available, due to light loss from the large number of transmission surfaces causing very low contrast. Due to it's complexity and high number of transmission surfaces, it really did not come into it's own until coating was developed. The planar was used as a base for lens derivatives, though in asymmetric form. Almost all the high-aperture lenses supplied on Japanese cameras are modification on the Planar.
|
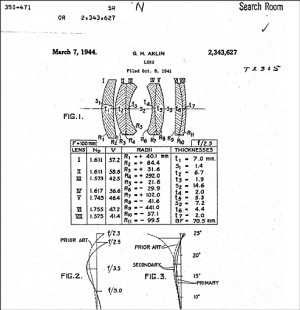 |
Patent issued 1944
Full name:
According the prescription USP 2,343,627
(Aklin/Kodak) it is a seven element Biotar type.
|
|
Production
Production started somewhere in 1940. All Serno's start with capital E which stands for 4
Complete cameras can be obtained from E-bay, prices from USD 99 and up. Shipment can be steep as weight exceeds lbs 30.
llllllllllllllll
|
 |
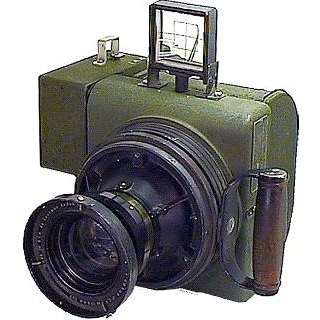
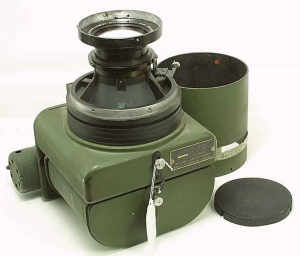
Aero Technica 45 Probably thanks to the experience gained during WWII the Linhof Aero Technica 45 evolved. Compact motorized camera system primarily for high quality oblique aerial photography. Large 4x5 in. or 6x9 cm images on 5 in. or 70 mm perforated rollfilm (approx. 150 exposures per magazine load). llllllllllllllll |
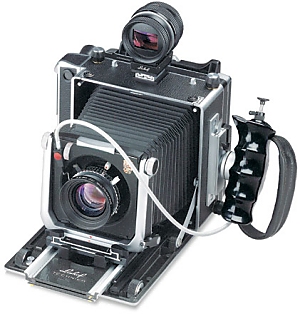 |
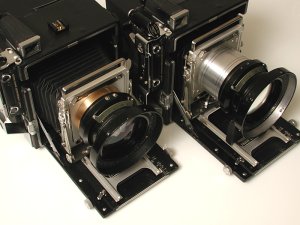
Master Technica 45 According many photographers this camera is the non plus ultra.
Allthough our Speed Graphic sometimes referred to as "The Poor Man's Master Technika" , we know our Pacemaker beats the Master on one important feature at least - The focal plane shutter. We have to disappoint Linhof owners who want to mount the Aero Ektar and want to experiment....Sorry, it won't work even if it is possible at all to get it mounted, you still will need a big black hat to control the shutter time. llllllllllllllll |
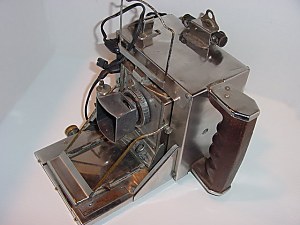 |
Stainless steel
This is a Graflex 3x4 completely covered with stainless steel. This camera was made for a crime photographer for the Toronto Star News Paper.
His name was Norm James. The camera he used had a CARL ZEISS LENS (TESSAR)1:4.5/2cm - Set in compur shutter, Leitz rangefinder.
|
 |
US MARINE Graflex
From the 1940s and the latter days of World War II, shown here is a very rare Folmer Graflex 4x5 military combat press camera in excellent condition.
Made by Folmer-Graflex of Rochester, New York, 1944 and 1946. This camera bears the serial number, 1969. The lens on this camera is a 127mm. f/4.7 Kodak Anastigmat Special with the serial number, EE1171. The �EE� prefix on the number indicates a Kodak manufacture date of 1944.
The camera was the property of the U.S. Marine Corp. But it was apparently transferred to the U.S. Navy, because there�s a brass Navy i.d. plate.
|
 |
Master Graf ???
Hybrid Camera? No way, just a Century Graphic (2-1/4x3-1/4). I must admit the anatomical grip is a nice add-on but at a price these days! llllllllllllllll |
 |
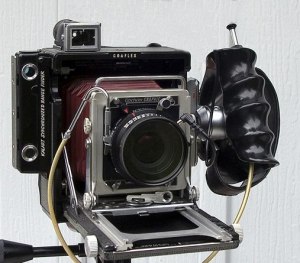
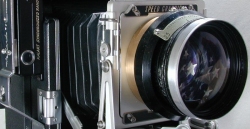
Pacemaker Speed Graphic 45 Also known as "Burnett Combo"
This is the Pacemaker Speed Graphic from the fifties with a WWII lens - Aero Ektar 178 In (1944). |
|
Early Model
Got in an early Aero Ektar with a Serno EA350.
|

|
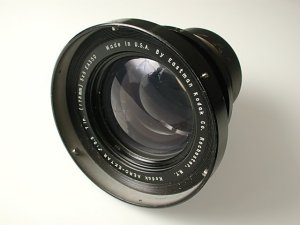
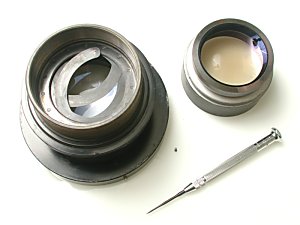
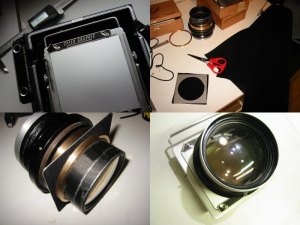
Disassembled Aero Ektar (EA***)
If neccessary to clean the lens from the inside, the lens must be taken apart.
Once removed it is not neccessary to replace them though...
I don't plan any rides in a B-25 shortly so there is little danger the elements will getting loose due to bumps and rocking while airborn in a flying fortress.
Click image left to get a clear view of the location of the screws. |
 |
Specs
We only can give the specs from the model we have EE.
Dimensions:
|
....
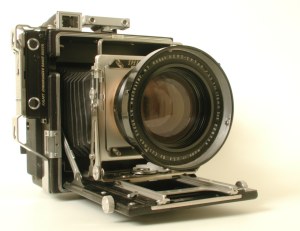
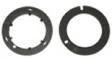
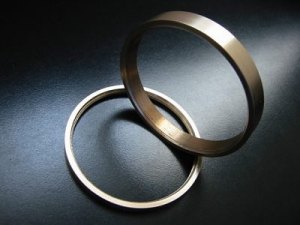 Mounting the Aero Ektar
The # 1 Solution ("Burnett Combo") #I Spacer and retaining ring The whole project was discussed by extensive phone and E-mail communication with Jo Lommen (Jo is an expert on restoring Press Cameras and much more.)in Roermond (NL). This was a very important start after buying the Aero Ektar EE*****. We looked over different possibilities to mount the beast. In our pursuit we've found images of David Burnett and came in contact. As David kindly shared photographs of his own configuration, we decided to go for this solution.
In our minds this was not extremely difficult to do but...
|

 In progress....
#II The lensboard Construction.
The material used was brushed aluminium with a thickness of 1mm
|
......

|
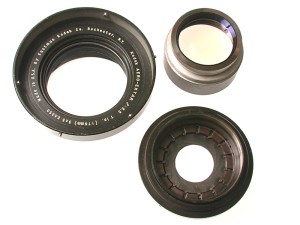
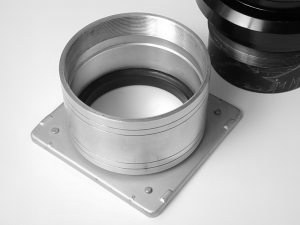
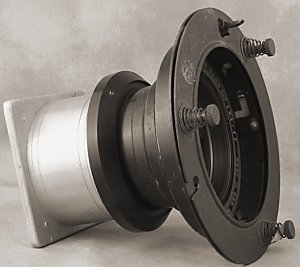
Alternate mounting solution. Second best choice...
By now you will have read any syllable about the mounting of the Aero Ektar, but there are more ways...
We have found this construction consisting of an original Graflex lensboard with a mounted tube.
N O T E :: There is one big advantage though on using this setup. Changing lenses is much easier and faster with this tube!
With this knowledge under your belt and our tips, please feel free to pick your choice. |
|
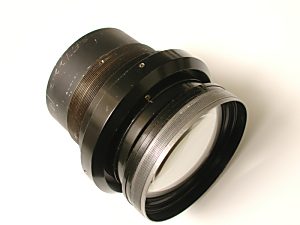
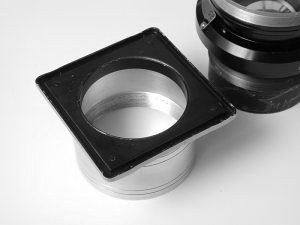
Alternate mounting solution. part II Detailed view
Detail of the .above construction:
Mount the lensboard the usual way...and screw in the Aero to the end stop.
Note:
|
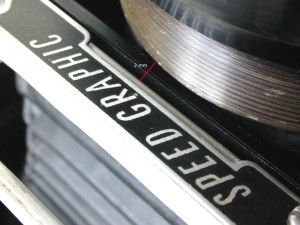 Image I 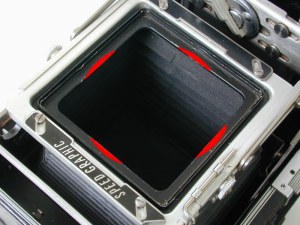 Image II |
The Perfect Fit U N D E R - C O N S T R U C T I O N Detailed view
Working with the two types above and evaluating the movements and weight on the front panel, it crossed my mind there must be another possibility to mount the AE.
Disadvantage:
N O T E :: Speaking for myself I think this is a minor nuisance, however collectors may feel different!. For us Photographers the only thing that counts is that it does not harm any functionality with other lenses at all. In my view the Aero Ektar can compete only on f2.5 with the modern plasmats. Modern lenses can perform much better when uniform sharpness and contrast is required. |
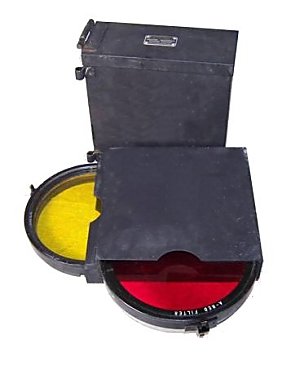  |
Original Filters
These filters are for the 178/2.5 according Ebay seller! Kodak Aero-Ektar lens . Filters of this size usually cost around $300-$400.00. They are used for B&W photography to cut glare and add contrast. They are solid colored red and yellow glass. The glass diameter is 6 inches and the thickness is about 1/4 inch. They come in the original individual metal drawers and the metal case.
Shown here is a package for the Aero Ektar. |
 |
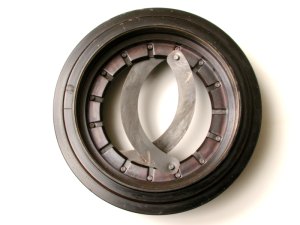
Filter Holder ??
The filters above measured 6In and were also meant for the Aero Ektar 12In. |
====
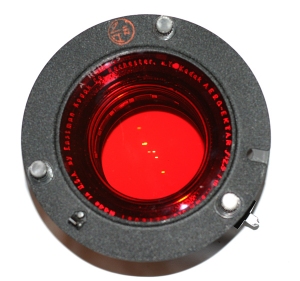 |
The real McCoy...
Can anybody shed some light on it? Yes, Oliver Kruse could, thank you Oliver!
The mount consists of two parts holding and securing the drop-in filter.
|


|
|
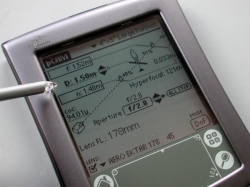
Working with the Aero Ektar f 2.5 A few notes After you did mount the Aero and adjusted your Kalart RF you're ready to shoot!
Beware of the the very small dof at all times. To give a little understanding see our Palm screen.
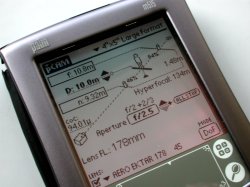
If you focus within 6ft you need the GG and of course a tripod. A second screen dump will show the Values for a distance of 10 meter.
If you use a palm already read below:
Pcam description: One more thing, even mounted on a sturdy tripod, try to avoid camera movement by using a long cable release. Have fun! |
 |
Radio Activity
The rear elements of the Aero-Ektar lenses are famous for having thorium glass that is a mild gamma radiation emitter. This lens element does, indeed, emit gamma radiation, approximately 3 mR/hr. according to my Geiger counter. I looked into what exactly this means to the timid photographer. My brief web research indicates that if you put this lens in your (big) pocket for 8 hours a day, 5 days a week, after six months you would have been exposed to the 5000 mR maximum permissable annual occupational exposure. So, don't grind it up and eat it, use it for a pillow, make it part of your uniform, or put your body in contact with this device on a regular basis.
Beyond a couple feet away, the detected level of radiation disappears into the background.
llllllllllllllll See our link for Mr Briggs for more information on Radio Activity! |

As you probably understand by now, this shopping list is not intended for your local Mall. Instead you have to google and search for the Speed Graphic, the Aero Ektar as well the Mask no 2.
The spacer, retaining ring and drilled lenshole will add some more difficulties, look out for a good machinist...
It takes a while to get it and a long while to get it right...
Looking for an Aero Ektar or Lensboard?
Burnett Combo
What do I need to build the Aero Ektar - Speed Graphic:
Jo Lommen can help you, right now he offers a lensboard, retainer ring and the spacer aswell. E-mail >>>>>> Jo Lommen.
Need Help?
Want info on how to do it yourself ?
Use our TalkBack button!
Have an Aero yourself, want to mount it?
Need a Lensboard?
Use the TalkBack button!
 Legal!
About
Whois
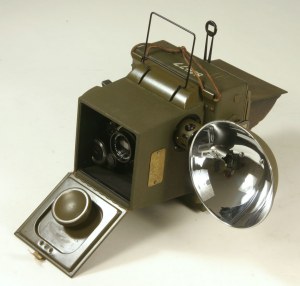
Aldis
Aero Project
The Workout
Legal!
About
Whois
Aldis
Aero Project
The Workout
 Memorandum
Encounter...
Graflens
Lenses+
Holes+
My Pacemaker SG's
Books
Graflinks
Speedlights
Gallery
WICF
Contact
Filmholders
Start Page
Whatsnew
Memorandum
Encounter...
Graflens
Lenses+
Holes+
My Pacemaker SG's
Books
Graflinks
Speedlights
Gallery
WICF
Contact
Filmholders
Start Page
Whatsnew