 |

 Condition - Unexposed
|
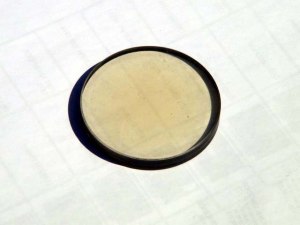
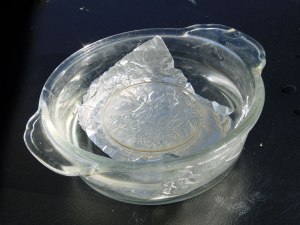
Sunning the Aero contributed by Georges Laloire Like everyone who is interested and intrigued by the Aero-Ektar, I have read that exposing to ultra-violet rays of the sun could reduce or remove the brownish stain of the rear element. Myth or truth ?, I wanted to find out....
I took a glass jar, folded a foil of cooking aluminium and placed it
inside, filled the jar with water, dropped the degreased rear group in it
with the browned glass facing up and let the sun do the healing. Exposing to the Sun lasted from noon to six pm, and was repeated several times giving the element a total of about 36 hours of UV bathing.
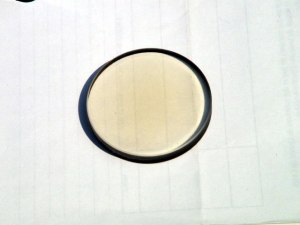
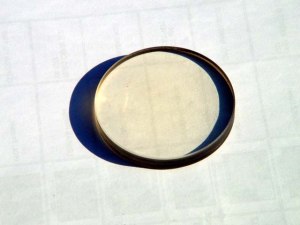
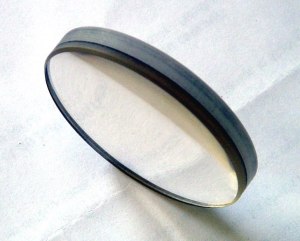
Here are the results. One can see there is a difference between the three
pictures.
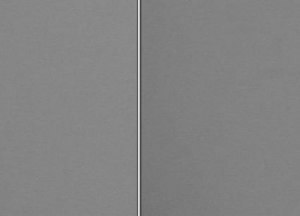
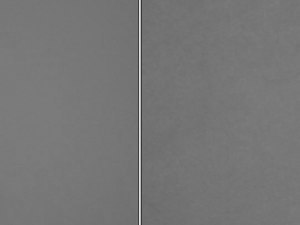
I also tried to show the effect of the browned glass on a picture. I simply
took two defocused images of the same flat board in my kitchen, with and
without the browned lens in front of the lens of the digital camera. Both
pictures were taken in succession, so the light can be considered
as constant. I repeated this after exposing the element by UV rays.
The difference is less spectacular here but noticeable (on the original digital files). Looking forward to your results or comments eventually. Mail me through the user site...
Comments JohnD ::
As far I can see, the difference is very clear and the experiment well done! |

 f2.5 is this still valid??
You have to find out yourself... We did not do either of the two but were curious though how it would effect the speed of F2.5.
|
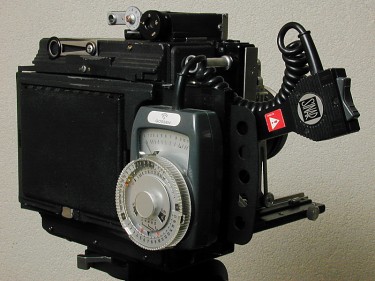
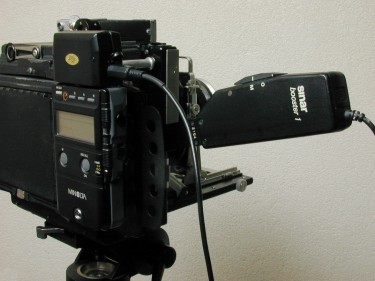 Measuring is knowing!
We have used the SinarSix CDS meter and the Minolta IV/Sinar Booster. Starting with the SinarSix and measuring at the film plane we could not find any discrepancies while measuring a Kodak ND card(18%). Just to be sure we used the Sinar Booster also measuring in the film plane. This meter is capable of measuring in 1/10 stops. Results were compared with a Minolta 1 degree spotmeter and again no extreme differences were noted. Different measurements showed 1/10 to 2/10 stops difference occasionally. However to keep it simple (Kiss - Keep it simple stupid), from now on we will use f2.8 for future meter read-offs as it is not very convenient to use one of this meters with this heavy combination. I'm thinking of a Sekonic L2 clip on meter together with my favorite Weston Master or Sekonic Studio deluxe, maybe even My Ranger-9 will do. However I feel it is sufficient to carry a Selenium meter in the field with the option to measure reflected or incident light. For more about meters please refer to our links.
|
 Sekonic Clip-on meter
It took some time to acquire a Clip-on meter to mount on my accessory shoe... However I have found one on Ebay, working and within tolerance. This is not very common as selenium cell's deteriorate over time.
The meter has a little split(shown) for high readings and once you push a little pin the whole cell will gather the light for low readings.
|
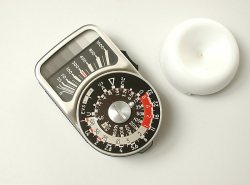
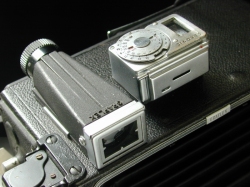 Sekonic Clip-on II
Image above shows the meter for readings at low light. Image on the left shows the baffle closed for high readings. Note also the NR 2 mask needed to get the proper view with the Aero Ektar 7" on the tubular finder. |
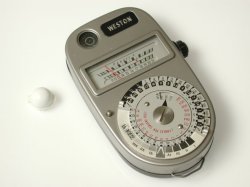
 Weston Master IV
From 1940, ads in the Masterbooks showed the Weston Master Light meter as the best meter. The last edition 1958 showed the meter on the left...the legendary Master IV. Actually the last in the Weston Master series with cd/ft2 readout. Example: Memorized Full Moon will measure 200 cd/ft2 placed in Zone VII : This will result in 60 cd/ft2 in Zone V (Our pivotal point) Which will give us an exposure of 1/60 f11 with a film of 100 Ansi. (more westonmaster.com) Primarily meant to measure reflected light, the meter could also be used for incident light metering by means of the Invercone. Any selenium meter from the IV up to the Euromaster II will prove itself in the field. |
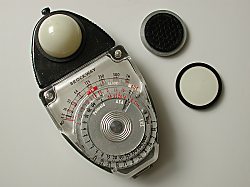
 Weston Ranger 9
The Weston ranger 9, used frequently by Ansel Adams (Remark: If he did not forget to bring it along - Moon over Hernandez). Note the Zone system scales on this meter. And also the candlles per sq foot values assigned to the arbitrary numbers. This is a CDS meter, though a little difficult to find the proper batteries , it is very precise and can measure reflected light (18 degrees window) and incident light as well. (Note the small dome) |
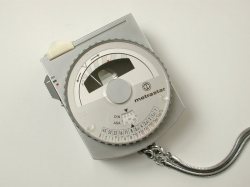 Metrastar by Metrawatt
Not USA made, but a very sophisticated and especially sturdy meter, probably the best meter in that time (1969). Having also a 18 degree selective measurement area (Controled through the mirrored window) and also a sliding diffusor, the meter is thus suitable for both light measuring methods. Eventually lost the battle, competing with Gossen Germany. Taken over by Gossen and the design went unfortunately in the fridge...! Using mercury cell Px 13/625 which are no longer produced. Meter can be powered by Wein replacement cells. |
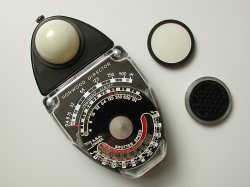 NorWood Director
Not to forget the famous USA made Norwood Director. At the time competing heavily with the WestonMaster. Very well known by cinephotographers and still photographers as well. Selenium meter for incident light and a reading in foot-candles. Reflected light metering was also possible by means of the grid. |
 Brockway
Brockway also USA made, a direct descendant of the Norwood Director. For complete listing and history see: www.johndesq.com/director |
| Formulae |
|---|
| Test bench |
| Exposure Metering |
| Meter Calibration |
| Asking a Photograph |
| Misc Polaroid holders |
| Interested? Want to join? - Send your commitment and experience.. Use our TalkBack button! |
 |
Have an Aero yourself, want to mount it? Need a Lensboard? Use the TalkBack button! |

