 |

|
A pristine classic meter in the hand is worth two digital meters in the shop window! or What to expect when we measure with a classic handheld meter?
| ||||
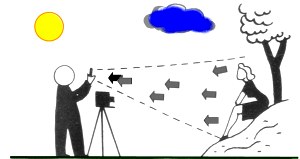
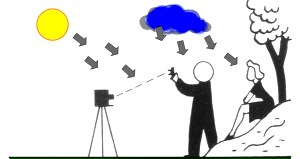
But remember it is the eye of the beholder that is the most important tool, combined with the human brains. In this command center the final area will be chosen and defined as middle-gray (Kodak test card). If all fails, we can say: "We've found the problem ..It is us"
I could tell you stories...here is just one - On a Seminar I met this guy, doing B&W photography for more than 6 years, complaining about emulsions as he had most of the time very thin negatives, forcing him to use grade 4 most of the time. Questioning him about how he used the meter gave me a dumb look but it turned out he used incident light mode with his Minolta Autometer III. Nothing wrong with that if you know how...
(Note: Working in incident mode requires correction of ISO - half the ISO value i.e use 50 ISO instead of 100 ISO to get the shadows a little more pronounced from filmbase plus fog - ) Well he was pointing the dome to the subject instead of the other way around i.e facing the camera!
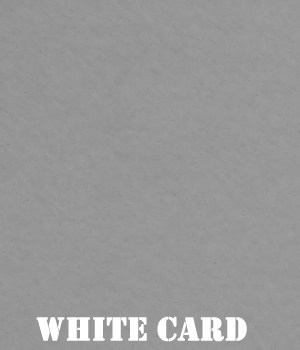
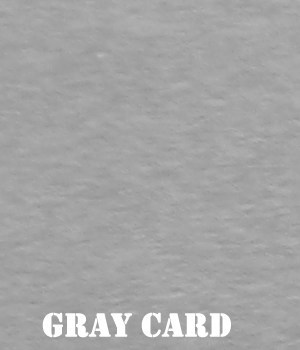
Most of the time scenes have much more tones, to get acquainted with this fast we have to go in deeper. It is like a "Right in your face, get your hands dirty" approach I must admit, but you will benefit from this knowledge for the rest of your life :-). Select a white, gray(test card) and black subject or use cardboards (Do a closeup reading without casting a shadow of your meter). Measure each subject and expose for the meter recommendation(Arrow or pointer). Develop all the same time and evaluate all three negatives. You will quickly discover the density is the same for all three negatives.
Above you will see three cards : White - Gray - Black
This is the most important lesson and proof in your career as a photographer. There are lots of shuttertime/aperture combinations possible, however there is only one that will yield the correct exposed negative.
Second one is the old rule : Expose for the shadows and develop for the highlights
If we wanted no detail (why should we do this? - pure theoretical) we should expose for Zone II resulting in an exposure of 1/500 @ f16.0 (Three stops from Zone V)
Well this is nice Huh? We are in control....Actually this is only a primer, if you want to go any further, surf the WWW and search for "Zone System"
A print full of tones but empty of emotional content is as dull as a perfectly typed but meaningless manuscript. |


|
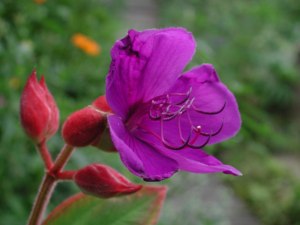
Visualization is very important if you strive for the perfect exposed negative. In this example we did measure the wooden fence and moved the pointer to Zone III and exposed accordingly. Imagine what happened if we followed the meters recommendation (arrow - Zone V). Take your time...(Some things in life can not be rushed and shouldn't be...a.o making a good Photograph) A very good book, we heartily recommend is: "The Negative" by Ansel Adams (ISBN 0-8212-1131-5)
One of my favorites is "Schwarzweiss-fotografie nach dem Zonensystem" Author Andreas Weidner.
Verlag Photographie ISBN 3-7231-0041-4 NOTE: OoP might be available used at Amazon.Com |
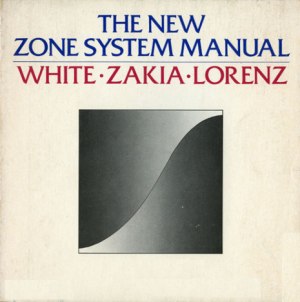 |
The New Zone
System Manual is the most extensive single book on the Zone System to date. It
shows how to bring all the variables of the photographic process under control. The
New Zone System Manual teaches the individual how to visualize the image before
exposing the photograph. It applies to all kinds of photographycreative,
manipulative, multiple-image and multiple-exposure.
Minor White…Richard Zakia…Peter Lorenz…three experienced teachers and photographers combine years of training and experience to create this important book. Their material is on method and techniqueand their approach is understandable for anyone seriously exploring black & white photography. The New Zone System Manual features a sensitometry for working photographers that can lead to a deeper understanding of the nature of photography. For amateurs and professionals, this method of image control can be applied for consistent fine quality in straight photography or experimental photography. Any photographer who knows the essentials of exposure meter use, developing, and printing can master the Zone System. NOTE: OoP (Out of Print) Available used at Amazon.COM |


|
If you really want to be in control, you will need a Spot meter Shown on the left are the space meter and the first commercial meter from Minolta, a direct descendant of the meter used on the moon. If you see the example image above where different zones were marked and placed, it might be clear that this is not possible with a normal averaging meter. The measuring angle is not small enough.
Just to name some brands; Minolta, Pentax, Soligor, Sekonic Spot, Gossen Spot. Both meters pop-up regularly on Ebay at a fraction of the cost.... |

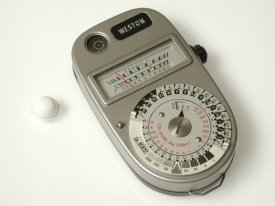 |
Weston Ranger 9 The Weston ranger 9, used frequently by Ansel Adams (Remark: If he did not forget to bring it along - Moon over Hernandez). Note the Zone system scales on this meter. And also the candlles per sq foot values assigned to the arbitrary numbers. This is a CDS meter, though a little difficult to find the proper batteries , it is very precise and can measure reflected light (18 degrees window) and incident light as well. (Note the small dome) |
|
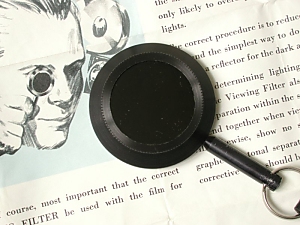
Panchromatic Viewing Filter #1. Besides determining lighting contrast, the Panchromatic Viewing Filter also shows the effective tonal separation within the scene. Color that seem to blend together when viewed through the Filter will, likewise, show no separation when photographed. If tonal separation is desired a suitable corrective filter should be used on the camera lens.
|
|
Click on the image on the left to see the Mouseover version.
In the first image the flower stands out very well against the background. This will look very different if you use Panchromatic film. Note the bright colors that blend with the background. Without correction the photograph would look very dull indeed!
In practice you hold the filter for your eye while looking and studying the zones and contrast. |
|
Below is some more info...I modified this Weston Master V somewhat so I can more easily explain novices what real measuring is about... Study the scales and read some definitions about the zones, it will help you visualize the Zones in practice. Have fun...Expose for the Magic and develop for the Surprises...
NOTE:: The reason I've chosen the Weston Master is a personal one.. (I feel a meter from the same era would be more appropriate). |

|
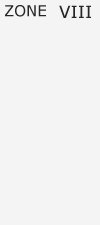
Weston Master V adapted for easy reading Zones. A little grey scale was glued inside, showing ZONE II - ZONE VIII. ZONE III has been marked with a black line corresponding with the black dot on the scale. ZONE VII has been marked with a red line corresponding with the red dot on the calculator scale. Please note: These meters are averaging type meters, thus to measure important parts in the scene you have to go in and do a close reading while avoiding shadows casted by the meter. |

|  | II - Dark gray-black, possibility of slight texture, you think you see it - maybe. Mostly gradation. | |

| 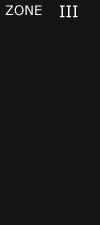 | III - Important Zone, very dark gray, but good texture and detail can be seen. Dark textured bark on shadow side of tree. Where you will probably want to "place" your shadow details. Darkest detail and texture. Zone III example: | |

|  | IV - Medium-dark gray, dark green foliage, shadow side of Caucasian skin. Details plainly visible. | |

|  | This is Zone V representing KODAK Neutral grey card.(A standard reference for exposure evaluation and grading. The card is comprised of a large 18% neutral grey area ). This is the pivotal zone when measuring. Clear north sky (panchromatic rendering). Dark skin. Gray stone. Average weathered wood. Middle gray (18% reflectance) |

|  | VI - Rich mid-tone gray, average Caucasian skin in sunlight, shadowed snow on bright sunny day, sharp fine detail visible. |

|  | VII - Bright light gray, highest Zone that will still hold good details. Weathered white paint, silver hair. VIII - Light gray-white, shows last texture (minimum) but no detail. Reflected highlights from light colored skin, textured snow in sun. Gradation exist. Zone VII example: |

|  | VIII - Almost white, must be compared to white to tell difference, no detail or significant texture visible. Lightest gradation values. |
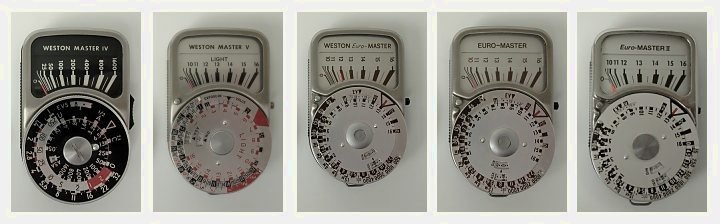
Weston Master IV, V, Weston Euro, Euromaster, Euromaster II . Any one of these meters would make a fantabulous companion for your Combo! No more guesstimates... |
| Not quite..... Actually this is the same as measuring the Neutral Gray test card from Kodak with a reflected light meter, one exception though you need only one hand! When we measure the light falling upon the subject, instead of measuring the reflection we still need to compensate for the subjects we measure.
Generally speaking we can say:
When using Black & White film it is advisable to adapt your Iso setting 1/2 to 1 stop lower, to raise the dark zones a little more above filmbase and fog. |
|
Addendum Some thoughts on LF Photography: Don't get obsessed with the weight of a camera. If you are going to take pictures in the field, you'll be carrying a large tripod, film holders, lenses, a dark cloth, a light meter, and all the chowder that goes with taking pictures. Plus chances are you'll also be toting another smaller format camera. So all that will probably weight in the neighborhood of 20 pounds, and probably even more. So what's the difference between 22 pounds and 25 pounds? Not much. * Slow down, take your time, and work methodically. There are more ways to screw up than you can imagine. The quickest way to mess up is to try to save time and work quickly. There are times when you have to work fast, like when the light is changing, But in general, large format photography is slow and deliberate. If you come up with a system and stick with it, you'll ruin a lot less film. |
| Using filters and Bellows draw will influence your exposure time dramatically...
When using filters it is straightforward once you know the filter factor - just multiply this factor by your exposure time.
Bellows draw is a little more complicated. You will find many formulae elsewhere on this site.
|
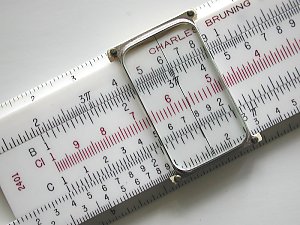 |
Oh, you've noticed already? Yes, I like archaic tools, hence don't call me old fashioned though, I use an Ipod also :-) I use my slide rule and apply mental arithmatic but feel free to use your Mobile Phone, PDA, calculator, coffee machine or whatever.... Bellows extension - measured from the middle of the lens (place of diaphragm) to the filmplane. In our example this is 250mm. 250:178(Aero Ektar 178mm) = 1.4 This is the compensation in f stops, if you need the BEF use the square number = 1.9 On the left you can see how it looks on our pocket slide rule (Those things don't need any batteries and are 99.5% accurate) Note: The slide rule is from the same era as my AE - 1944.
|
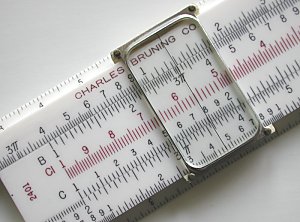 |
Example II: Bellows extension is 356. Our lens is the AE 178mm. Seasoned LF shooters know immediately the outcome. Shown for your examination on our slide rule also...:-) |
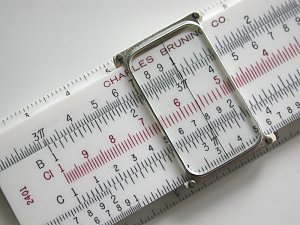 |
While making the photographs and adjusting the slide rule I've found when BE= 100  , the BEF is about when working with the Aero Ektar 7In. , the BEF is about when working with the Aero Ektar 7In.This is sheer magic indeed....
NOTE: Practically the largest bellows draw when working withe AE - 314mm from the diaphragm to the filmplane.
|
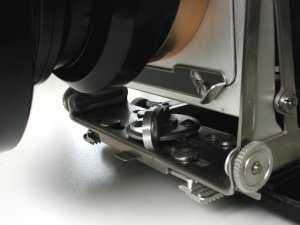 |

To get the magnification mentioned above get the front standard flush with the bed as shown. |
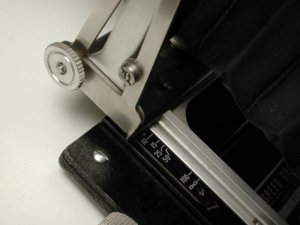 |
In this image you can see how far to rack the bed out to the front. The back of the frontpanel base should stop just before 8ft.
These examples are only valid if you did mount the Aero our way.... We love to see the results made with the Pi extension. |
| INDICATED EXPOSURE: | 1 * * 2 * * 4 * * 8 * * 15 * * 30 * * 60 * * 120s |
| T-MAX 100: | 1 1.5 2 2.5 3 4 6 7 9 11 15 20 27 37 50 65 84 105 130 160 196 233 |
| T-MAX 400: | 1 1.5 2 3 4 5 7 9 12 15 20 27 37 51 70 95 132 180 240 330 450 610 |
| Polaroid Type 55: | 3 6 15 25 36 65 90 140 204 504 |