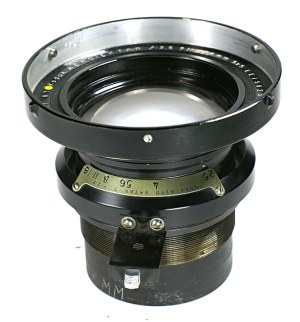
USP 2,343,627 (Aklin/Kodak)
Seven element Biotar AE 7In f 2.5
AE 7 In - EE13273 |
In search of the holy grail...
Determining the circle of good definition.
We probably all know the "Aero Ektar 7In" was designed to cover 5"x5" on 5 1/2" aerial roll film. Image areas on cameras are rectangular or square, lenses do not cast rectangular or square images onto the focal plane. Instead they cast circular images.
The image is a circle, blurring to black around the edges. First, the usable Image circle (Circle of good definition) is much smaller though as we don't want fall-off on the edges of the used format (In our case 4x5".) Second, it is interesting to learn how much movement can be achieved without vignetting, questioning what is the usable diameter of the beast?
The diagonal of our square (5x5) is 7.07". At least we could expect a usable circle of good definition with a diameter of 7.07 Inch.(Radius 3.535), thus the circle of illumination would be somewhat larger but how much? The diameter of our film 4x5" is 6.4".
Not much of a problem with macro as with 1:1 we would have a circle of good definition of 14 Inch :-)
As the Aero Ektar was not built for other than infinity and certainly not for any movements (other than rocking in a B-17 or B-24), it was not necessary to get a much larger image circle to suit the task. The size of the image circle determines the coverage range of a camera which supports movements. If this is indeed the case, we only have one inch to play with, thus restricted to rise and moderate back tilt only...! (Note:Landscape mode only!)
On our Pacemaker there aren't many more movements except very limited shift, so why bother?
I just want to find out more and decided to mount the Aero Ektar on a lensboard for my 8x10 camera.
I plan to expose a few sheets 809 and not only...for my peace of mind!
The Proof is in the making....Stay tuned .
|
Preliminary::
Checking movements to the MAX
After a lot of fussing and guessing beforehand, studying the GG while checking the movements, I did notice vignetting with MAX back tilt and hard to tell blurring with MAX. rise.
Actually, this is what I did expect in the first place - Limited Image circle.
However, when I did cut a hole in a cardboard and with the help of an assistant who was holding the board and lens in place on my Wisner 810, I got a better view....
Checking the image on 8"x10" took my breath away...
I was thinking, when I made an exposure on 8x10 film , I would get a circle with a diameter of 7" or about..., enabling me to measure the Image circle directly on the film.
How wrong this thinking proved to be....
I did focus for infinity and it was hard to distinguish the outline of the circle on the height of the film(8"). Thus the diameter of the Image circle is at least betwween 7"-8". Do I need a 11"x14" camera to get the answer I hoped for?
|
Preparation :: part I
|
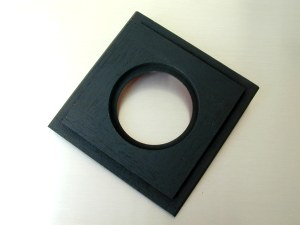
In order to get a final answer about the size of the image circle, I had to mount the Aero Ektar on a sturdy board as Jo convinced me a cardboard would not hold long enough and eventually the lens would sag or worse fall out..
I don't want to risk any damage done to the lens for maybe one or two exposures just to satisfy my curiosity.
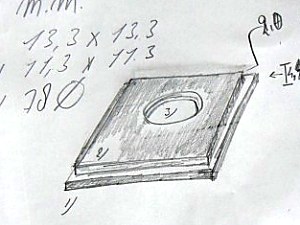
Initially a drawing was made by Jo during telephone and E-mail conversations and after checking and double check the board was made by who else..Jo Lommen.
As you can see on the drawing, this is not just a square piece of wood. It has the same specs as an original board. No matter wood, aluminum or metal, Jo has an answer.
Quoting Jo: "If I have to make a board for one day or for eternity, the works are the same..."
|
Lens Mounting :: part I
|
As soon as the board came in, I did a quick check if the board would fit just to be sure, this is much easier done without the Aero Ektar mounted already.
Must I tell it did fit? Actually I did not have any doubts at all...
Well it did go in smoooooothly!
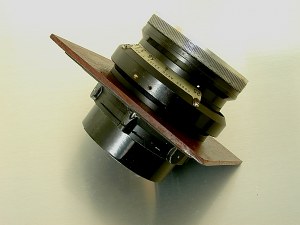
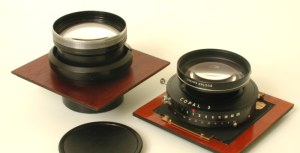
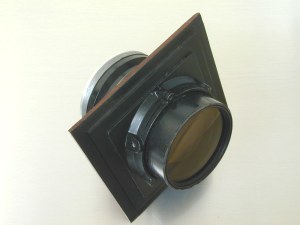
Next I did mount the AE on the board and used part of the original cone as a retainer ring. No need for wrenches, just tighten it till it sticks and then some...
A few brush strokes to get the retainer ring pitch-black also and almost ready to mount on the camera.

After tightening the retainer I also taped the rest of the barrel with black isolation tape.
Pitch-black, thus minimizing flare!
All set..next step is mounting the Aero on the Wisner TD.
I like this mount so much that I will do some modifications on the light trap of the Pacemaker this weekend.
|
Lens Mounting :: part II
|
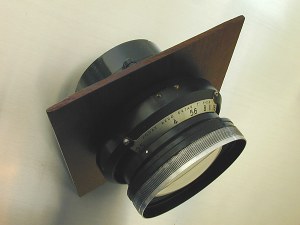
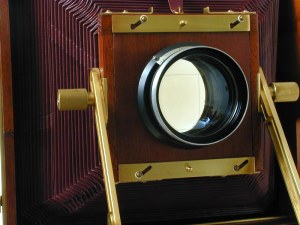
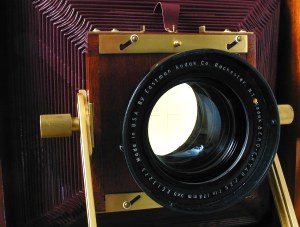
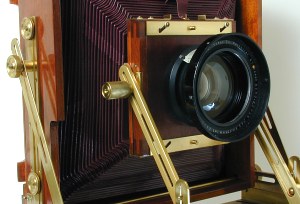
The actual placing of the lensboard and checking focus. Two images, one with hood and one without hood showing a perfect match with the Wisner TD 8x10.
In the top image you can see the checkered GG when you click on the image.
With a focal length of 178mm the Aero Ektar acts as a wide angle lens on 8x10. First impression is interesting, however not what I expected. The idea behind all this was to determine the image circle and from there define the circle of good definition.
I did not see a circle at all, strange as this may seem, I did a simular test with a Schneider 210 barrel once and it clearly showed a circle.
Hardly can wait to see the GG with daylight.
As it is night now, I have to wait till next day to proceed with my observations.
|
|
Observations, workout & comments.
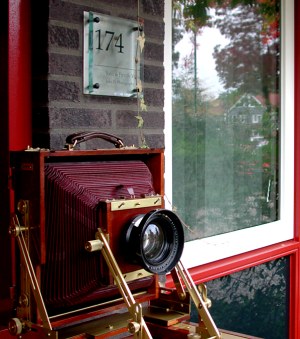
The Docter had to leave its place for the Aero...
|
The day after:
Seeing the camera next day, it appeared to me the lens was not that big after all. It certainly is for 4x5 but not for 8x10!
Well the big aperture is still looking impressive. Normally lenses for view cameras have their largest aperture around f 5.6
In the morning daylight there is definitely a fall-off visible. I guess my eyes and mind were adapting with too much forgiveness last night, or maybe I did not want to see any fall-off :-)
Well it is there allright...it would be a Godsend if it showed the same as my 165mm f 8.0 Schneider Kreuznach Super Angulon.
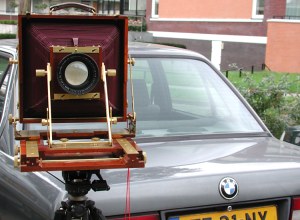
The total combination, camera, tripod, ballhead and AE lens are clocking a merely 30 lbs, thus trying to do the tests close to the house or the car.
On with the project....
|
|
Observations, workout & comments.part II
|
Dancing with the 810 combo:
Studying the GG I've learned the usable COGD (Circle of good definition) has a dioganal of 16cm (7.8").
Radius of circle is thus 8cm. This means if we project the longest dimension of our film 5In (12.5cm) on the diameter (16cm) we have a reserve of 1.8 cm (18mm)to either side.
As the circle of good definition can vary depending on enlargement etc, it is a kind of individual acceptance. If you do contact prints only, the COGD can be a little more.
This visual test was done while focused on infinity with an aperture of f 11.0 . The edges where scrutinized with an 8x Schneider loupe. When in doubt I also checked differences in density with the Sinar booster. Not pretending a scientific approach I must admit, but this will do fine for my personal understanding of the AE. In time I will make an exposure on Polaroid 809 when I can get a proper time of one or two seconds @ 11. (80 ISO)
This is the only way to get a reasonable result and the 2 seconds I can manage placing a lens cap or my black hat at the end of the exposure.
N O T E : The Wisner lacks a Focal plane shutter.
The results of this extensive schlepping around with this combination were threefold:
-
# 1 The knowledge that we have about 1.4 inch for tilting or rise and shift.
Apart from the limited movements on the Pacemaker (less on the Anniversary), most of us won't be very concerned by this, as we have chosen this optic to use wide-open.
Using the AE at f2.5 will show a much smaller COGD, which won't bother us in the least, as we want ..B O K E H in the first place.
-
# 2 The knowledge that with a magnification 1:1 we will have an image circle of around 16 inch which is quite sufficient to cover the whole film area.
Planning a table top with Studio flash soonest...
- # 3 If you accept a slightly larger COGD it will cover 5x7" (Diameter 8.6") The problem, not having a focal plane shutter remains...
|
Epilogue
|
My curiosity has been satisfied.
In the end, it seems not necessary to pack the camera and look around for a location.
A much lighter combo will do the job much better...It is a relief to handle the Pacemaker with the AE, also I have learned it is not that heavy at all after dancing with the Wisner 810 and its f 2.5 lens.
Having said and done all the above, I wish to thank Jo Lommen for his kind help and also my assistant Fini, who was holding the AE with its provisory lens board in the preliminary tests.
If we had to go through with all this tests, measuring etc, she sure would suffer an AE arm instead of a tennis arm.
|
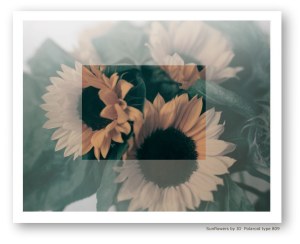
Test exposure M=1
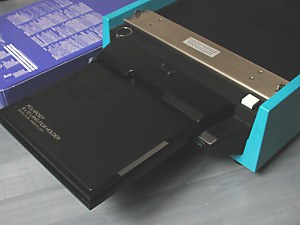
Polaroid 8 X 10Land Film Processor |
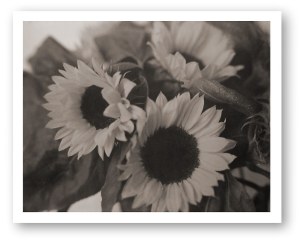
The proof...showing a perfect coverage of 8x10 film
Image was made with a magnification 1:1 @ f5.6 showing an interesting shallow depth of field.
Baby Sunflower impression with the Aero Ektar 7" Mounted on the Wisner TD 8x10.
The setup & procedure:
- Bellows draw is 14"
- Exposure compensation 2 stops
- Working aperture f5.6
- AE with lens cap on & placing Polaroid 8x10 cassette.
- Remove darkslide
- Dim surrounding lights, taking Lens cap off
- Triggering Studio flash with small flash unit
- Replace lens cap - reinsert dark slide
- Process...
- Evaluate!
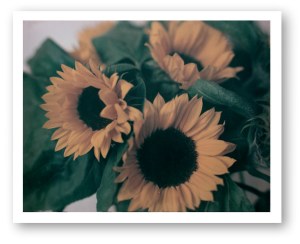
Same subject...now on 809 instead of 804
Seeing the results at 1:1 gives me confidence to use this configuration when a nice shallow depth is required. With the Wisner TD it is much easier to adjust the film plane at one's preference.
The lensboard will serve me more in the future for sure!
Wondering what you would have gotten with a 4x5 Speed with AE at M+1?
Not very difficult as you can see on the left. The highlighted center would be the resulting image.
8"x10" film is 4 times 4"x5" film.(diagonal 12.8" and 6.4" respectively).
Area of 45 circle = (  r2) 32 square inches (81 mm2) Area rectangle 4x5=20 square inches r2) 32 square inches (81 mm2) Area rectangle 4x5=20 square inches
Area of 810 circle = ( r2) 128 square inches (325 mm2) Area rectangle 8x10=80 square inches
If your camera has lots of movements, it is easy to understand how far you can go, without vignetting.
Electronic Polaroid Land Film Processor for 8x10
Not a very cheap process...Costs are �14 per sheet. It is really a pain in the neck when something is going wrong.
The good thing is you will be more concentrated shooting these 8x10 Images.
|

 Legal!